Practical way to keep a litter box from smelling
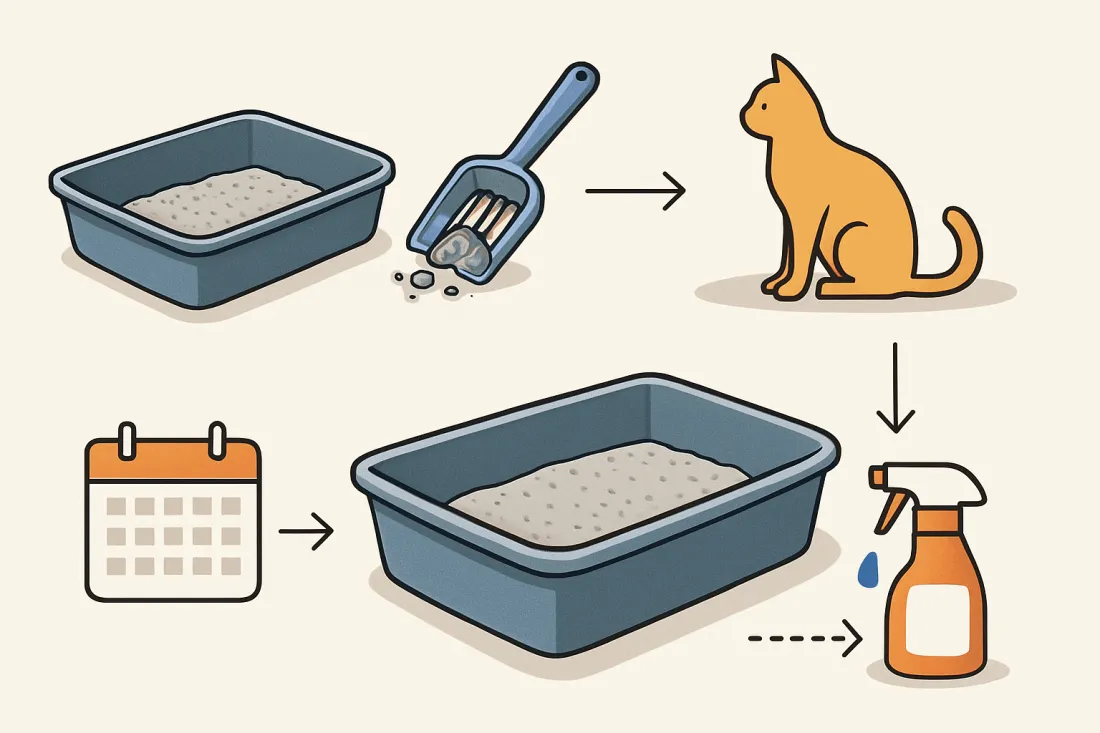
To keep a litter box from smelling in a typical U.S. home, you need three things working together: 1. Enough boxes in the right places so your cat actually uses them. 2. Clumping, unscented litter that you scoop at least once a day. 3. A simple cleaning schedule: daily scooping, weekly litter change, and monthly deep-clean of the box. If you do all three consistently and the box still smells strong, either the litter type or box location is wrong for your home, or your cat may have a health issue that needs a vet visit.
Why litter boxes smell and what is considered normal
Understanding what causes litter box odor helps you fix the right problem instead of just spraying air freshener.
Main sources of litter box odor
1. Urine breaking down – Cat urine is concentrated. When it sits, bacteria break it down and release strong ammonia-like smells. – If clumps are not removed daily, the smell builds up and spreads. 2. Uncovered feces – Feces smell strongest in the first minutes after your cat goes. – A good clumping litter and enough depth help cover it quickly and trap some odor. 3. Dirty box surfaces – Plastic absorbs smells over time, especially if urine soaks into scratches or corners. – If you only scoop but never wash the box, a permanent “dirty plastic” smell develops. 4. Bad ventilation or placement – A box in a tiny, closed closet or cabinet can trap smells and make them seem worse. – Covered boxes can concentrate odor if not scooped and aired out regularly. 5. Health issues in your cat – Sudden, very strong urine or stool odor can be linked to diet changes, dehydration, or illness. – If the smell changes quickly and you are cleaning well, call your vet for guidance.
What is a normal litter box smell?
It is realistic to expect: – A brief, noticeable smell right after your cat uses the box, especially for poop. – A faint, neutral or slightly “dusty” scent when you stand close to a well-maintained box. It is not normal if: – You smell strong ammonia or feces as soon as you walk into the room. – The smell lingers for hours even after scooping. – Your eyes or throat feel irritated near the box. If your home smells like litter box even when you are not near it, your setup or routine needs adjusting.
How many litter boxes you need and where to put them
The number and placement of boxes matter as much as cleaning. A cat that avoids the box will find other places to go, which smell far worse.
How many litter boxes do you actually need?
A widely used rule of thumb is: – Number of cats + 1 = minimum number of litter boxes Examples: – 1 cat → aim for 2 boxes – 2 cats → aim for 3 boxes – 3 cats → aim for 4 boxes Why this helps odor: – More boxes mean less waste per box, so each one smells less intense. – Shy or bullied cats can choose a quieter box instead of holding it or going elsewhere. If you live in a very small studio, you may not manage the full formula, but try to provide at least two separate spots if you have more than one cat.
Best places to put litter boxes in a U.S. home
Aim for locations that are: – Quiet but not isolated: away from loud washers, dryers, and kids’ play areas, but not locked in a tiny closet. – Easy to reach: no tight corners, steep stairs for senior cats, or blocked doors. – Well ventilated: rooms with some airflow (bathrooms with fans, laundry rooms with vents, open corners of living rooms). Common workable spots: – Bathroom corner with a washable mat under the box. – Laundry room away from machines and detergent storage. – Open area in a hallway or spare room. Avoid placing boxes: – Right next to food and water bowls. – In dark, noisy furnace rooms. – In sealed cabinets with little airflow. If you want more help with layout and behavior issues, see the guide on how to avoid common litter box problems.
Choosing the right litter type for odor control and cat comfort
The best litter for odor is one your cat will actually use and that you can maintain easily.
Main litter types and odor performance
| Litter type | Odor control in practice | Cat comfort and health notes | Best use case |
|---|---|---|---|
| Clumping clay, unscented | Strong odor control when scooped daily; clumps trap urine and feces. | Many cats accept it; some dust. Choose low-dust formulas for people or pets with sensitivities. | Most households wanting simple, reliable odor control. |
| Clumping clay, heavily scented | Masks smell for humans but does not remove it; can mix with natural odors. | Some cats dislike strong perfume and avoid the box. | Short-term use if you must mask odor, but monitor your cat’s reaction. |
| Crystal/silica gel | Absorbs moisture well; can control urine odor for longer between full changes. | Texture can be uncomfortable for some cats; pellets can be noisy. | Small households that prefer less frequent full litter changes. |
| Natural clumping (corn, wheat, walnut, etc.) | Can control odor well if scooped daily; some have mild natural scents. | Often softer on paws; some cats may try to taste it. Check for allergies. | Owners wanting more plant-based options with clumping behavior. |
| Non-clumping clay | Weaker odor control; urine spreads through the box and needs frequent full changes. | Generally accepted by cats; can get soggy and heavy. | Short-term or backup use; not ideal for long-term odor control. |
| Pellet litters (paper, wood) | Good at absorbing moisture; odor control varies by brand and cleaning routine. | Softer pellets can be gentle on paws; some cats dislike the feel. | Cats with paw issues or post-surgery, or owners who prefer low dust. |
Decision criteria when choosing litter for low odor
When you pick litter, weigh these factors: 1. Your cat’s preference – If your cat stops using the box after a switch, odor will get worse no matter how “advanced” the litter is. – Introduce new litter gradually by mixing it with the old one over several days. 2. How often you can scoop – If you can scoop twice a day, most clumping litters will work well. – If you can only scoop once a day, choose a litter known for strong clumping and odor control. 3. Dust and scent sensitivity – For people or pets with respiratory issues, look for low-dust, unscented options. – Strongly scented litters can irritate sensitive noses and may push cats to avoid the box. 4. Box type – High-sided or covered boxes can trap more odor, so you may want a litter with better odor control. – For open boxes, odor spreads more easily, so scooping frequency matters more. Aim for unscented clumping litter as a starting point. If odor is still strong with good scooping, then experiment with other types.
Daily, weekly, and monthly litter box cleaning routines
A predictable routine is the most powerful way to keep smells down. Here is a simple schedule you can adjust to your home.
Daily routine (5–10 minutes total)
Do this at least once a day; twice is better in multi-cat homes: 1. Scoop all clumps and solid waste – Use a sturdy scoop to remove urine clumps and feces. – Scrape along the bottom and corners where clumps stick. 2. Top up clean litter – Maintain a depth of about 2–3 inches so clumps form well and waste is covered. 3. Check the surrounding area – Shake or vacuum the mat. – Wipe any visible splashes or tracked litter. 4. Quick smell check – Stand a few feet away. If you smell strong ammonia even after scooping, plan a full change sooner. For a more detailed daily routine, you can also read the guide on daily litter box maintenance.
Weekly routine
Once a week (or more often in multi-cat homes): 1. Dump all litter from each box into a trash bag. 2. Scrape off stuck bits from the bottom and sides with the scoop. 3. Wash the box using the safe cleaning method in the next section. 4. Dry thoroughly and refill with fresh litter to the right depth. If you use non-clumping litter, you may need to do this every few days instead of weekly.
Monthly (or every 1–2 months) deep-clean
Even with weekly washing, plastic boxes slowly absorb odors. Plan a deeper clean at least every month or two: – Follow the deep-clean steps below. – Inspect the box for deep scratches, cracks, or lingering smell. – Replace boxes that still smell bad after cleaning.
Deep-clean method for litter boxes: step-by-step
Use this method for plastic boxes, including covered ones.
- Prepare a cleaning area
Choose a bathtub, shower, utility sink, or outdoor area where you can rinse safely. - Empty the box completely
– Dump all litter into a trash bag.
– Tap the box gently to loosen stuck litter. - Rinse with warm water
– Rinse out loose debris and dust.
– Avoid very hot water that might warp thin plastic. - Wash with a mild, pet-safe cleaner
– Use a small amount of unscented dish soap or a cleaner labeled safe for pets.
– Scrub all surfaces, including corners, rims, and the underside of any lid. - Optional odor treatment
– If odor lingers, you can use a diluted white vinegar solution (for example, equal parts water and vinegar) to rinse the box after washing.
– Let it sit for a few minutes, then rinse thoroughly with water. - Rinse thoroughly
– Remove all soap or vinegar so no strong smell remains that might bother your cat. - Dry completely
– Towel dry or air dry until no moisture remains, especially in corners and seams. - Refill with fresh litter
– Add clean litter to your usual depth.
– Avoid adding old litter back in; that reintroduces odor.
If a box still smells strongly after this process, or if it is heavily scratched, it is often easier to replace it.
Safe cleaning products for litter boxes and surrounding floors
You want products that remove odor without leaving harsh residues that might drive your cat away or irritate paws.
Safe options for plastic litter boxes
Generally safe choices when used as directed and rinsed well: – Unscented dish soap and warm water. – Diluted white vinegar rinse after washing. – Pet-specific enzymatic cleaners (follow label instructions) if you are dealing with strong organic odors. Use these with care: – Bleach solutions: Some owners use heavily diluted bleach to disinfect. If you choose this, rinse extremely well and let the box air out completely so no strong smell remains. Strong bleach odor can repel cats.
Safe options for floors around the box
For tile, vinyl, or sealed hardwood around the box: – Mild floor cleaners that you already use safely elsewhere in your home. – Enzymatic cleaners for any urine accidents outside the box. Always: – Rinse or wipe away cleaner residue where your cat walks. – Let the area dry before your cat returns, especially on slippery floors. Avoid using strong air fresheners or heavy perfumes directly near the box. They do not fix the source of the smell and can make the area unpleasant for your cat.
Troubleshooting when the litter box suddenly smells worse
If your setup used to work and now the smell is suddenly stronger, work through these common causes.
1. Cleaning routine slipped
Ask yourself: – Have you missed scooping days recently? – Has anyone else in the household changed the routine? Action: – Return to daily scooping and a weekly full change for at least a couple of weeks and see if odor improves.
2. More cats or changes at home
New pets, guests, or changes in your schedule can affect how often boxes are used. Action: – Add another box if your cat family or usage increased. – Spread boxes to different rooms so they are not all in one busy area.
3. New litter or box type
A recent switch can backfire: – Your cat may dislike the new litter and only half-cover waste. – A new covered box may trap more odor than your old open one. Action: – If odor worsened right after a change, consider going back to the previous setup or adjusting gradually.
4. Hot weather or poor ventilation
Warm, humid air makes smells stronger. Action: – Improve airflow: open a window, use a bathroom fan, or move the box to a slightly cooler, ventilated area. – In summer, you may need to scoop more often or change litter more frequently.
5. Possible health issue in your cat
Signs that odor might be health-related: – Sudden, sharp change in urine or stool smell. – Diarrhea, very hard stools, or blood. – Your cat straining, visiting the box often, or avoiding it. Action: – Call your veterinarian, describe the changes, and follow their advice. Do not just cover the smell with stronger litter or sprays.
Structured checklist: litter box maintenance schedule
Use this checklist to keep your litter box from smelling over the long term.
Daily checklist
- Scoop all clumps and solid waste from every box.
- Top up litter to maintain 2–3 inches depth.
- Shake or vacuum the litter mat.
- Wipe any splashes or tracked litter around the box.
- Do a quick smell check from a few feet away.
Weekly checklist
- Empty each box completely.
- Scrape off stuck litter from corners and bottom.
- Wash the box with warm water and unscented dish soap.
- Rinse thoroughly and dry fully.
- Refill with fresh litter to the usual depth.
- Inspect the surrounding floor and walls; clean any splashes.
Monthly (or every 1–2 months) checklist
- Perform a full deep-clean with optional diluted vinegar rinse.
- Check each box for cracks, deep scratches, or lingering odor.
- Replace any box that still smells bad after cleaning.
- Review box count: number of cats + 1 boxes where possible.
- Review placement: quiet, ventilated, easy-to-reach spots.
Seasonal or as-needed checklist
- Reassess litter type if odor control or tracking is a problem.
- Adjust cleaning frequency in hot or humid weather.
- Monitor your cat’s behavior for any signs of discomfort or avoidance.
Common mistakes that make litter boxes smell worse
Avoid these habits if you want a low-odor home.
- Relying on strong scents instead of cleaning
Sprays, candles, and scented litter can mask smells for you but do nothing to remove waste. They can also bother your cat. - Using too few boxes for multiple cats
Overloaded boxes fill up quickly, making odor control almost impossible. - Letting litter get too shallow
Thin layers do not clump well, so urine spreads and sticks to the bottom. - Skipping box washing
Scooping alone cannot remove the film of residue that builds up on plastic over time. - Choosing a hidden but poorly ventilated spot
A box in a closed cabinet or tiny closet may trap odor and discourage your cat from using it. - Using harsh cleaners without rinsing
Strong chemical smells can make your cat avoid the box, leading to accidents elsewhere.
FAQ about keeping a litter box from smelling
What is the single most important thing to keep a litter box from smelling?
Consistent daily scooping is the most important step. Removing urine clumps and feces before they sit for hours prevents most strong odors from forming, no matter which litter you use.
How often should I completely change the litter to control odor?
For most clumping litters, a full change and box wash about once a week works well in a typical home. In multi-cat households or very warm weather, you may need to change it more often. If you use non-clumping litter, plan on more frequent full changes because urine spreads through the box.
Is a covered litter box better or worse for smell?
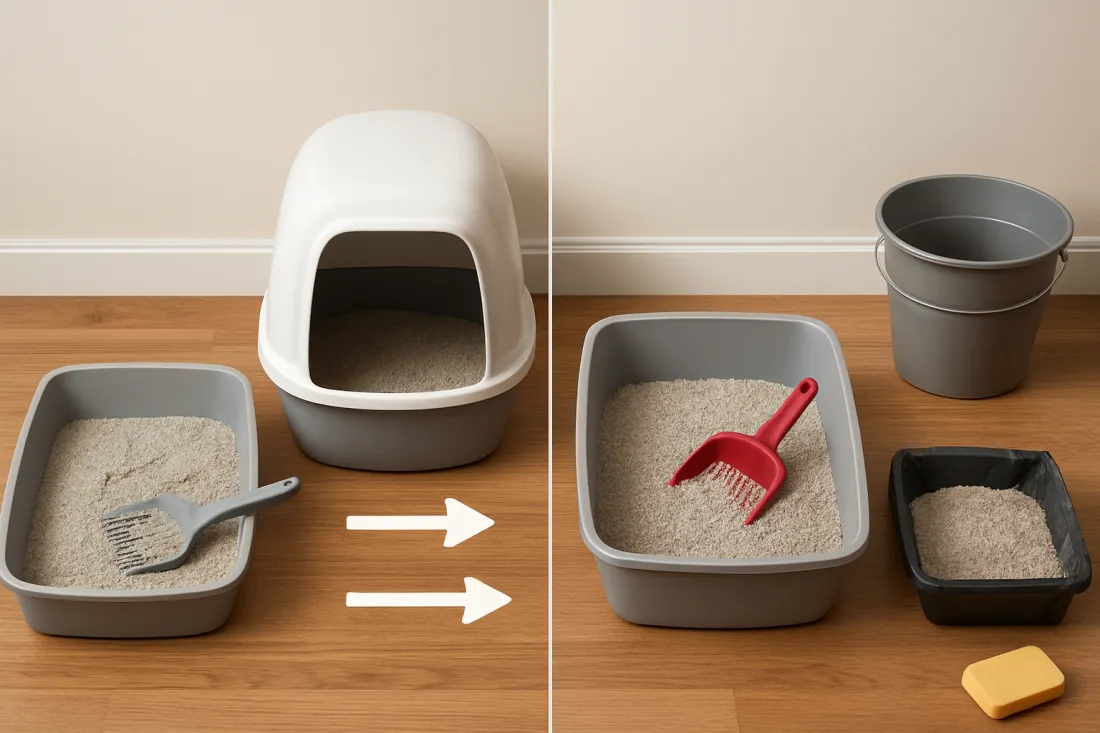
Covered boxes can trap odor inside, which may seem better for people in the short term but can make the inside very smelly for your cat. If you use a covered box, you usually need to scoop more often and occasionally remove the lid to air it out. Some cats prefer open boxes because they feel less confined and the smell is not as concentrated.
Can I put baking soda in the litter to reduce odor?
Many owners sprinkle a small amount of baking soda under or on top of the litter to help neutralize odors. Some cats tolerate this well, while others may dislike any change in texture or smell. If you try it, start with a light sprinkle and watch your cat’s behavior. If your cat seems hesitant to use the box, stop using it.
What should I do after reading this to improve my litter box smell today?
Start with three quick actions: 1. Scoop every box thoroughly right now and top up the litter depth. 2. Pick one box to fully empty and wash using mild soap and water, then refill with fresh litter. 3. Check your box locations and move at least one to a quieter, better-ventilated spot if needed. Then set a simple reminder for daily scooping and a weekly full change so the improvements last.
If you also want to support your cat’s overall well-being while you improve the litter setup, you may find it helpful to read about how to keep an indoor cat happy and safe.